How to Grow Shiitake Mushrooms on Logs: The Complete Outdoor Guide
The biggest upgrade to any shiitake mushrooms recipe is using mushrooms you’ve grown yourself — harvested and cooked within the hour. Our complete mushrooms growing guide gets you there instantly.
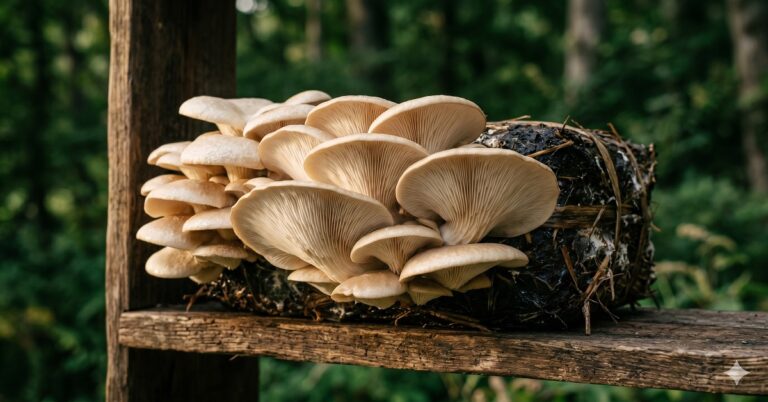
Log-grown shiitake is the most rewarding and lowest-effort long-term mushroom project for home growers. After a 6–18 month colonisation period, a properly inoculated log produces 2–4 flushes per year for 3–7 years, requiring nothing more than water and shade management between harvests. The flavour of log-grown shiitake is in a completely different league from anything commercially available.
Growing shiitake on logs is the oldest and most traditional method of shiitake cultivation — practised in Japan and China for over 1,000 years. It’s also, in terms of ongoing effort per harvest, one of the most efficient long-term growing projects a home grower can pursue.
Unlike indoor block growing (which produces faster but requires active environmental management), shiitake log cultivation works primarily on the mushroom’s own schedule. You inoculate once, manage moisture occasionally, and the mycelium colonises the log over months, building the nutritional reserves that fuel years of fruiting. The patience required upfront is paid back with compound interest. This guide provides comprehensive information oh how to grow shiitake mushrooms on logs.
Why Grow Shiitake on Logs? The Case for This Method
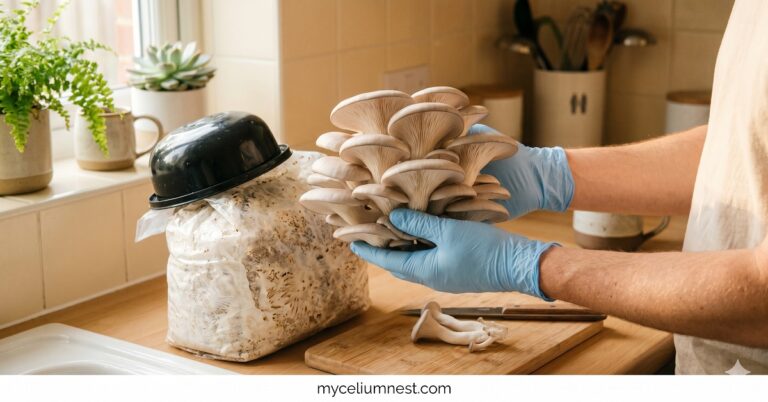
Before committing to log cultivation, it’s worth understanding how it compares to indoor block growing and grow kits. We have a full mushroom grow kit guide for those who want faster results with less setup — but for long-term production, logs win decisively on most metrics.
Choosing the Right Logs
Best Wood Species for Shiitake Logs
Shiitake (Lentinula edodes) is a primary wood-rotting fungus that evolved to decompose hardwood. It has strong preferences:
- Oak (Quercus spp.) — Best choice: Red oak and white oak are the gold standard. Dense, long-lasting, produce abundant flushes over the longest productive period. The tannins in oak create an environment that favours shiitake mycelium over competing fungi.
- Hornbeam / Ironwood: Second choice. Very dense wood; longer incubation but extremely long-lived logs (5–7 years of production).
- Beech (Fagus spp.): Works very well; slightly shorter productive life than oak.
- Maple and Alder: Acceptable. Softer than oak; faster colonisation but shorter productive life (2–4 years).
- Avoid: Softwoods (pine, cedar, spruce), black walnut (antimicrobial properties), or any wood with visible mould or rot at time of inoculation.
Log Dimensions and Freshness
Materials List
- Fresh-cut hardwood logs (oak, beech, hornbeam) — 3–6 inch diameter, 3–4 feet long
- Cut 2–8 weeks before inoculation
- Shiitake plug spawn — 100 plugs per log is a good starting amount
- 5/16 inch (8mm) drill bit — must match plug spawn diameter exactly
- Power drill or hand brace
- Hammer or mallet
- Cheese wax or mushroom wax — for sealing holes
- Heat source for melting wax (candle, camp stove, or wax pot)
- Brush or dauber for applying wax
Inoculation: Step-by-Step
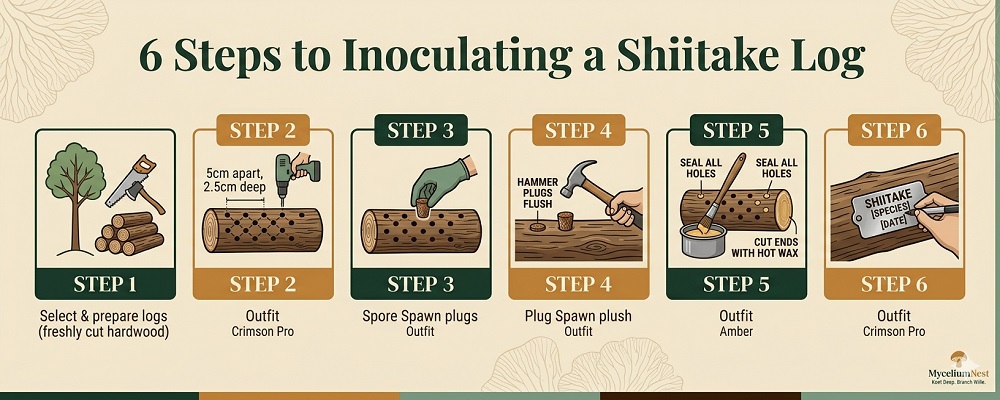
- Drill holes in a diamond pattern. Space holes approximately 5cm (2 inches) apart in a spiral or diamond pattern around the log circumference. Drill to a depth of 2.5cm (1 inch) — matching the length of your plug spawn. A drill stop collar ensures consistent depth and saves significant time on multiple logs.
- Insert plug spawn immediately. Work quickly after drilling — open air exposure begins drying the drilled holes. Place a plug into each hole and tap flush with the log surface using a hammer or mallet. The plugs should sit flush — neither protruding nor sunk below the surface.
- Seal all holes and both cut ends with wax. Melt cheese wax or mushroom log wax and apply with a brush or dauber while still liquid. Seal every drilled hole completely, and coat both cut ends of the log with a solid wax layer. This prevents moisture loss and blocks competing fungi from entering inoculation points. Work quickly — wax solidifies fast.
- Label each log. Use a permanent marker or metal tag to record the shiitake strain, wood species, and inoculation date. This is more important than it seems — you’ll want this information in 18 months when the first flush appears.
Incubation: The Long Wait
After inoculation, logs enter an extended colonisation (incubation) period. The mycelium spreads slowly through the dense hardwood, digesting lignin and cellulose and building the nutrient reserves that will fuel fruiting. This patience-testing phase takes:
- 6–12 months for smaller logs (3–4 inch diameter) or softer hardwoods (maple, alder)
- 12–18 months for larger logs (5–6 inch diameter) or denser hardwoods (red oak, hornbeam)
Incubation Environment
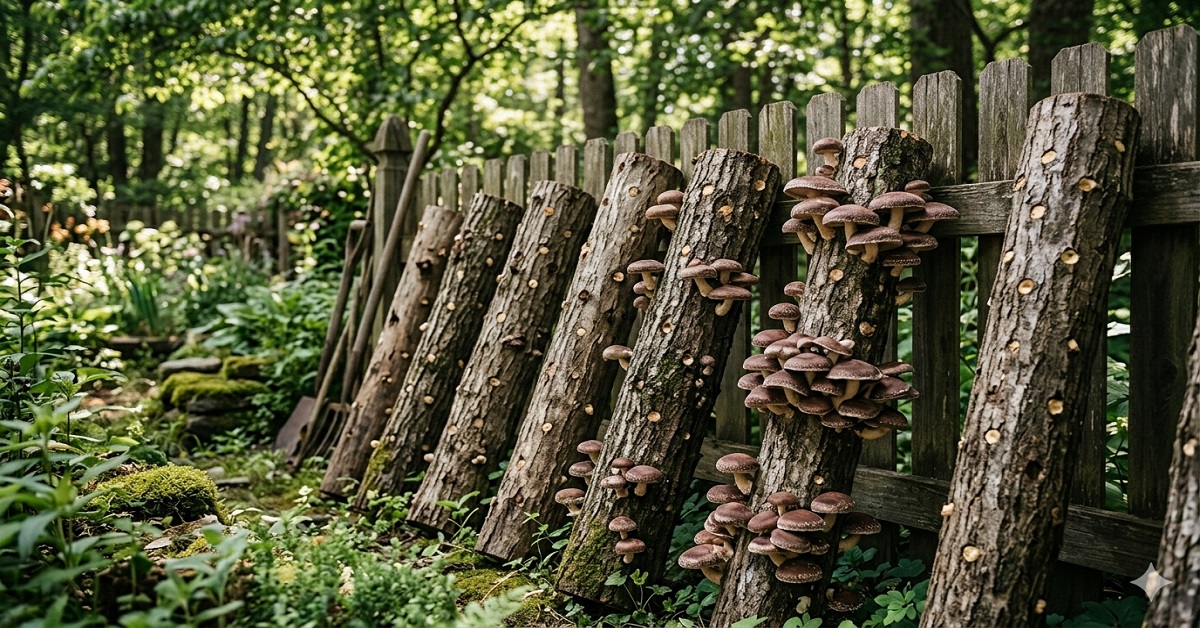
Stack logs horizontally (“log cabin” style) or lean them upright in a shaded location outdoors. Key requirements:
- Shade: Avoid direct sunlight, which dries logs rapidly. Dappled shade under a tree canopy is ideal. North-facing walls work well.
- Air circulation: Don’t stack logs so tightly that airflow is restricted — this invites competing mould growth.
- Moisture: Logs should feel heavy. In dry periods (2+ weeks without rain), water the logs for 10–15 minutes once weekly. Logs that feel light have lost moisture and colonisation will slow dramatically.
Pest Management: Protecting Your Logs from Slugs, Snails & Other Visitors
Outdoor log cultivation introduces a pest challenge that indoor growers never face. The warm, moist microclimate you carefully maintain around your fruiting logs is precisely what slugs, snails, millipedes, and various insects are attracted to. Understanding and managing these visitors is the difference between harvesting a flush and watching it disappear overnight.

Slugs and Snails — The Primary Threat
Slugs and snails are the most destructive outdoor mushroom pests. They feed nocturnally, appearing after dark or after rain, and can consume half a flush in a single night — leaving distinctive ragged bite marks and a trail of slime across the remaining mushrooms. Young pins are the most vulnerable; a slug can completely consume a small cluster of newly formed pins before dawn.
Other Outdoor Pests
Signs of Healthy Colonisation
After 3–6 months you should see: white mycelium visible at the cut ends or at drilled holes, sometimes pushing slightly outward. A faint mushroomy smell when you lean close to the log. The bark may show slight lightening or whitening at the ends — this is mycelium reaching the outer bark.
Triggering Flushes: The Cold Shock Method
Once logs are fully colonised, fruiting can be triggered by replicating the natural autumn conditions that signal shiitake to reproduce. The most reliable method is the cold-water soak method:
- Submerge the log completely in a container of cold water. A large plastic storage bin, a clean garbage can, or a cattle tank works well. Weigh the log down if it floats — a flat rock or brick is sufficient.
- Soak for 12–24 hours in water as cold as available — ideally 10–15°C (50–60°F). Well water or water left in a shaded container overnight works well in cooler months. Summer tap water is too warm; wait for cooler weather or add ice.
- Remove the log, stand it upright (fruit from upright logs distribute more evenly), and place in a shaded, humid location.
- Mist the log with water once or twice daily if ambient humidity is below 70%.
- Expect pins within 5–14 days. Shiitake caps develop over 5–10 days from pin to harvest size.
Triggering Schedule
After each flush, allow the log to rest for 6–10 weeks before triggering again. The mycelium needs time to rebuild its reserves. Triggering too frequently produces smaller, weaker flushes and shortens the log’s productive life. Most growers trigger 2–4 times per year, typically in spring and autumn when temperatures naturally favour shiitake fruiting.
Harvesting Shiitake from Logs
Harvest shiitake just as the cap veil (the thin membrane connecting the cap edge to the stem) begins to tear but before the cap fully flattens. At this stage — caps still slightly curved downward at the edges — the mushroom is at peak flavour, peak moisture content, and peak shelf life.
Twist the stem gently while pulling — the entire mushroom should detach cleanly. Do not cut at the base and leave stub remnants attached to the log — these can harbour competing fungi. For recipe ideas for your fresh-harvested shiitake, see our shiitake mushroom recipes guide.
Storage
- Fresh: 7–10 days in a paper bag in the refrigerator — significantly longer shelf life than oyster mushrooms
- Dried: Slice and dry at 50°C until brittle. Dried shiitake has extraordinary flavour concentration — arguably superior to fresh for soups and sauces. Store in an airtight jar away from light indefinitely.
Frequently Asked Questions
How long does a shiitake log last?
A properly inoculated oak log typically produces for 3–7 years before the wood is fully decomposed and production declines. Larger-diameter, denser-wood logs last longer. The log’s productive life is visible in its weight — when it feels very light (most of the cellulose and lignin digested), production will soon decline significantly. Spent logs make excellent raised bed amendments and compost additions.
Can I grow shiitake on logs indoors?
It’s not practical for most home growers — logs are heavy, require substantial humidity during fruiting, and produce much more efficiently outdoors where natural humidity and temperature fluctuation provide the environmental conditions that trigger flushing. Indoor block growing on supplemented hardwood substrate is a better approach for year-round indoor production. See our indoor growing guides for that approach.
My log has green or white mould growing on it — is it ruined?
Surface mould on the bark of an incubating log is normal and does not mean the log is ruined. Competing moulds (including Trichoderma) will colonise the outer bark surface but typically cannot penetrate into the heartwood where your shiitake mycelium is establishing. White mould on the bark surface is often actually the shiitake mycelium itself reaching the outer layers. Green mould on the outside of a log is usually not cause for concern — wipe it off with a damp cloth and ensure the log is in good shade with adequate air circulation.
Do I need to inoculate new logs every year?
No — that’s one of the great advantages of log cultivation. Once inoculated, the mycelium is self-sustaining within the log and will continue producing without reinoculation for the log’s entire productive life (3–7 years). To maintain a continuous harvest cycle, many growers inoculate new logs each year so that as older logs decline, fresh logs are entering their productive peak. Staggering inoculation by 1–2 logs per year builds a rolling “library” of logs at different production stages.
Disclosure: This article contains Amazon affiliate links. We earn a small commission at no extra cost to you. See our full disclosure.