Mushroom Contamination Guide: Identify, Treat & Prevent Every Type
Green = Trichoderma (discard outdoors). Pink/Red = bacteria (discard outdoors). Black = Aspergillus or Cladosporium (discard outdoors). White/grey wispy = cobweb mycelium (NOT contamination — healthy, continue). Blue/gold patches = metabolic pigmentation (healthy, continue). When in doubt, do not open indoors.
Contamination is the single most common reason home mushroom growers fail — and the single most common reason experienced growers lose batches. Understanding contamination is not just about recognising what went wrong; it’s about building a system where it almost never happens in the first place.
This mushroom contamination guide covers every type you’re likely to encounter in home cultivation: what it looks like, what caused it, whether it can be saved, when it must be discarded, and exactly how to prevent each type from occurring in your next batch. Whether you’re growing from a first oyster mushroom kit, running PF Tek jars, or managing a larger fruiting chamber setup, this reference applies.
Why Contamination Happens: The Core Causes
Every contamination event has a cause. Finding that cause — rather than simply accepting “bad luck” — is what separates growers who improve batch over batch from those who stay stuck at the same failure rate. The causes fall into five categories:
1. Insufficient Sterilisation or Pasteurisation
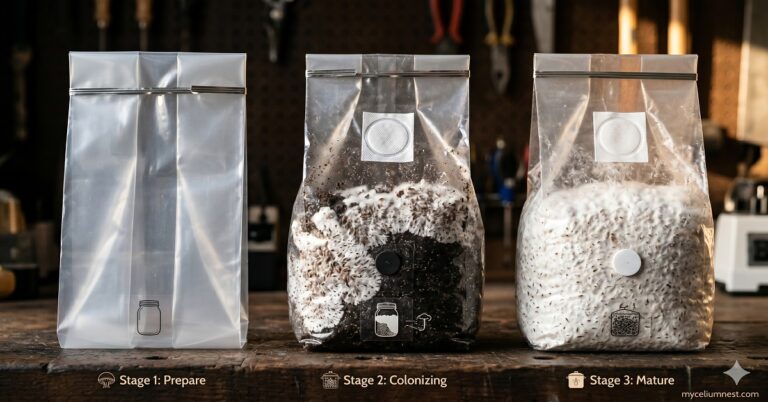
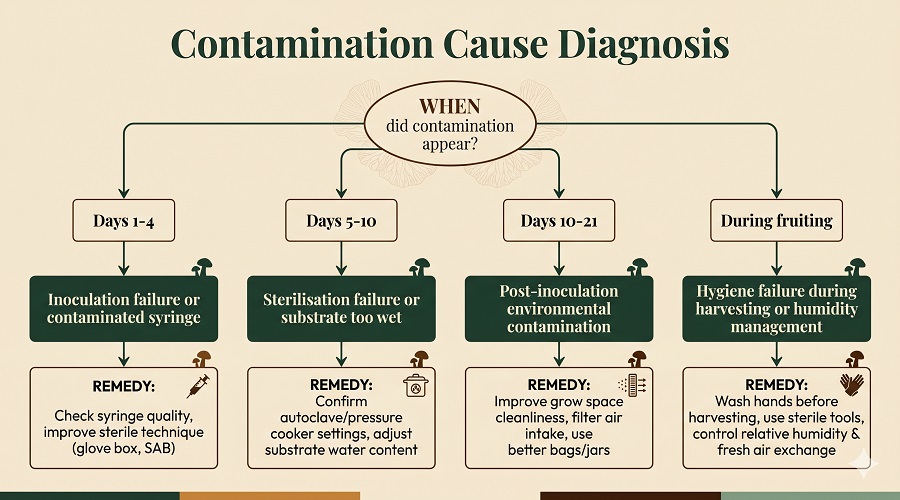
The most common cause for grain spawn and supplemented hardwood substrates. If your pressure cooker didn’t reach and maintain 15 PSI for the required duration, competing organisms survive sterilisation and rapidly outcompete mushroom mycelium once inoculated. Common signs: contamination appearing within the first 3–5 days of incubation, often at multiple points simultaneously rather than a single entry point.
2. Inoculation Hygiene Failure
The second most common cause. Contamination entering during inoculation typically appears within 48–96 hours — earlier than sterilisation failures. Sources include: unsterilised syringe needles, bare hands touching substrate or spawn, coughing or breathing near open jars or bags, unwiped work surfaces, or contaminated spore syringes.
3. Substrate Too Wet
Substrate at above 70% moisture content creates an anaerobic microenvironment that bacteria — particularly Bacillus species — thrive in. Overhydrated substrate feels like it’s dripping when squeezed rather than releasing 1–2 drops. This is especially common when beginners follow vague “add water until moist” instructions without performing the squeeze test.
4. Post-Inoculation Environmental Contamination
Contamination entering through filter patches, bag holes, or damaged jar lids during the incubation period. Signs: contamination appearing at or near the holes in a bag (rather than inside the substrate mass) or developing slowly over 2–3 weeks rather than appearing in the first few days.
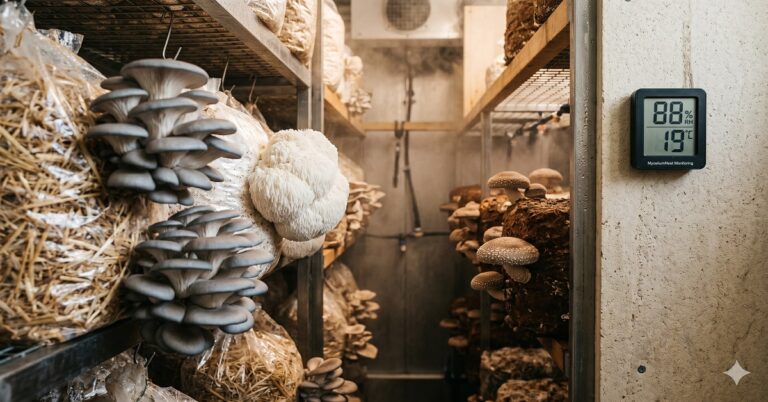
5. Temperature Too High During Incubation
Incubation above 30°C (86°F) dramatically accelerates bacterial growth and slows mycelial growth — the opposite of what you want. A bag at 28°C that feels warm when touched is already at the upper safe limit. A bag that feels hot is likely experiencing a bacterial bloom.
The Complete Contamination Identification Library
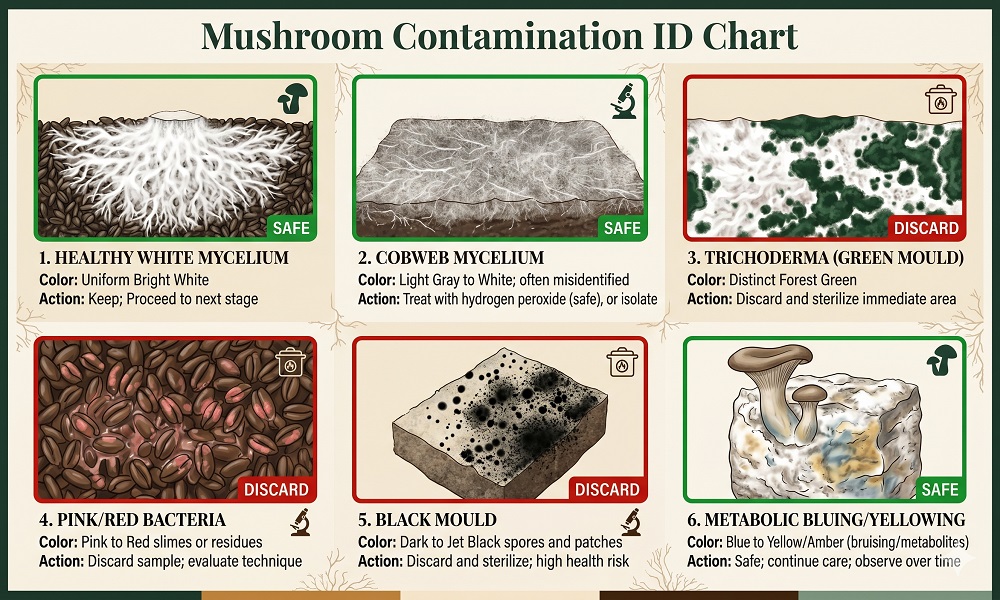
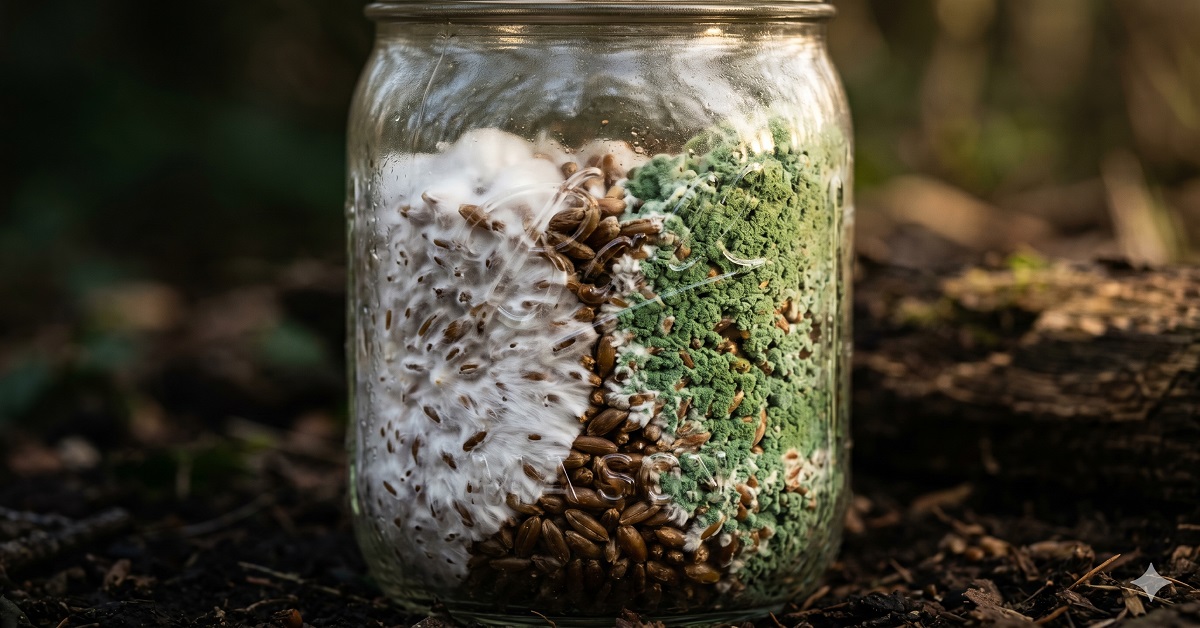
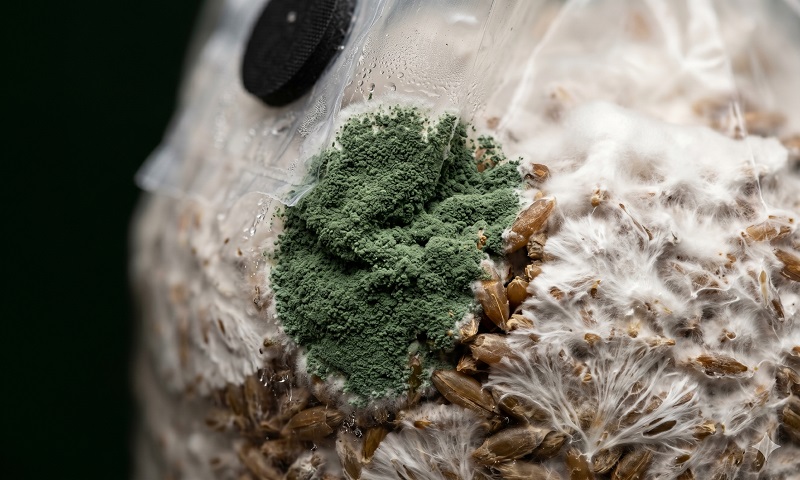
Type 1: Trichoderma (Green Mould) — The Most Common Contaminant
For the science behind why Trichoderma is so destructive: see the peer-reviewed research on Trichoderma peptaibols and their role as mushroom pathogens (Komon-Zelazowska et al., PubMed PMID 28261948).
Type 2: Pink or Red Bacterial Blotch — Bacterial Contamination
Type 3: Black Mould (Aspergillus or Cladosporium)
Type 4: Orange Bread Mould (Neurospora crassa)
Type 5: Cobweb Mycelium — NOT Contamination (Commonly Misidentified)
Type 6: Yellow or Blue Metabolic Pigmentation — SAFE
Areas of yellow-gold or faint blue colouration within otherwise white mycelium are metabolic secretions — byproducts of active enzymatic and respiratory activity. These are signs of vigorous, healthy colonisation. The key difference from contamination: metabolic pigmentation occurs within the white mycelial mass as a tint or overlay. There is no distinct boundary between the coloured area and surrounding mycelium, and the overall mycelium is still white and healthy-looking with no distinct smell change.
Can You Save a Contaminated Block? The Decision Framework
The core principle: There is no partial treatment for true contamination. Once green, pink, black, or orange contamination is established on mushroom substrate, the entire block must be discarded. There is no method of removing contamination from one area while saving the rest — the competing organism has already produced compounds throughout the substrate that will prevent healthy mycelial growth even in uncontaminated areas.
The 7-Layer Contamination Prevention System
Contamination is not bad luck. It is a systems failure — and it has a solution. The growers who run contamination rates below 5% aren’t more skilled than you; they’re more systematic. Here are the seven layers of prevention that work together to make contamination the exception rather than the rule.
Layer 1: Source Clean Genetics
The single highest-leverage contamination prevention step is purchasing spawn and spore syringes from reputable suppliers. A contaminated syringe will infect every jar it touches, regardless of how perfect your sterilisation and inoculation technique is. Buy from established vendors with recent positive reviews. For our tested supplier recommendations, see our resources and recommendations page.
Layer 2: Achieve True Sterilisation (Not Just Pasteurisation) for Rich Substrates
Pasteurisation (65–82°C) is sufficient for oyster mushrooms on straw. It is not sufficient for supplemented hardwood blocks, grain spawn, or BRF jars. These nutrient-rich substrates require full sterilisation at 121°C / 15 PSI. Ensure your pressure cooker actually reaches and maintains 15 PSI — many home pressure cookers lose pressure when the heat is reduced too much. A weighted gauge cooker (rocking weight) is more reliable than a dial gauge for this reason.
Our comprehensive review of the best pressure cookers for mushroom cultivation covers which models reach and maintain sterilisation pressure most reliably.
Penn State Extension — the leading US university mushroom research programme — maintains a comprehensive mushroom pests and diseases resource covering disinfectants, sanitation standards, and IPM practices for cultivated species.
Layer 3: Master Field Capacity (Correct Substrate Moisture)
Substrate at 65–70% moisture is the sweet spot. Above 70% creates the anaerobic, warm, wet conditions that bacteria thrive in. Below 60% slows colonisation dramatically. The squeeze test: a firm handful should release 1–2 drops of water maximum when squeezed hard. This single variable explains more contamination events than any other.
Layer 4: Inoculate in Still, Clean Air
Airborne contamination during inoculation is eliminated almost entirely by working in a still air box (SAB) or a flow hood. A SAB costs $0–$15 to build from a clear storage tub and dramatically reduces the airborne contamination entering open jars during inoculation. Our still air box vs flow hood guide explains which setup is right for your scale of growing.
Layer 5: Isopropyl Alcohol on Every Surface, Every Time
70% isopropyl alcohol (not higher — 70% kills more effectively than 91% due to water content aiding cellular penetration) should be applied to:
- Your gloved hands before touching spawn or substrate
- The syringe needle before every inoculation (then flamed)
- The entire work surface before you begin
- The outside of jar lids and bag tops before inoculating
- The outside of the spawn bag before opening
Layer 6: Inoculate Only When Substrate Is Fully Cooled
Inoculating substrate that is still warm (above 30°C) kills the spawn you’re introducing and creates the perfect warm, sterile environment for any bacterial survivors to dominate without competition. After sterilisation, substrate must cool to below 25°C before inoculation — typically 12–24 hours. Patience here prevents the majority of bacterial contamination events.
Layer 7: Inspect Daily and Respond Immediately
Contamination caught on day 2 is a single lost jar. Contamination caught on day 7 — after it has been sitting next to other jars in your incubation space — is potentially your entire batch. Check every jar and bag daily. Remove any contaminated container from your growing space immediately, without opening it.
For a systematic approach to prevention beyond contamination, Penn State Extension’s guide to Integrated Pest Management for organic mushroom farms covers monitoring systems, control strategies, and documentation practices used by professional cultivators.
Contamination by Stage: Where It Most Often Enters
For specific fruiting environment conditions that reduce contamination during the fruiting phase, see our detailed mushroom fruiting conditions guide. And for the specific fruiting chamber setup that provides the best environmental control, read our fruiting chamber guide.
Research on green mould in commercial oyster and button mushroom cultivation →
Frequently Asked Questions
My jar smells weird but looks fine — is it contaminated?
A strong, sour, ammonia-like, or distinctly chemical smell from an otherwise visually clean jar almost always indicates bacterial contamination that hasn’t yet produced visible pigmentation. Trust your nose. If the smell is off and you cannot identify it as the normal earthy/mushroomy scent of healthy mycelium, treat the jar as contaminated. Bacterial blotch can produce invisible toxins that are harmful even in visually uncontaminated substrate.
Can I use bleach to clean contaminated substrate before reusing it?
No. Bleach kills surface contamination but does not penetrate substrate deeply enough to address established mould or bacterial growth within the substrate mass. Bleach also leaves residue that inhibits mycelial growth. Contaminated substrate should be discarded and composted. The containers (jars, bags) can be sterilised with a diluted bleach solution (1:10 bleach:water) or boiling water, then rinsed thoroughly and dried before reuse.
I have a 90% contamination rate — what’s causing it?
A contamination rate above 50% almost always points to one of three root causes: (1) The spore or liquid culture syringe is contaminated at the source — try a different supplier and test with a small batch. (2) Your pressure cooker is not reaching or maintaining 15 PSI — verify with a separate pressure gauge. (3) You’re inoculating in open air with significant airflow — build a simple still air box. A rate above 80% almost always indicates a syringe source problem or inoculation in actively moving air (near a HVAC vent, open window, or fan).
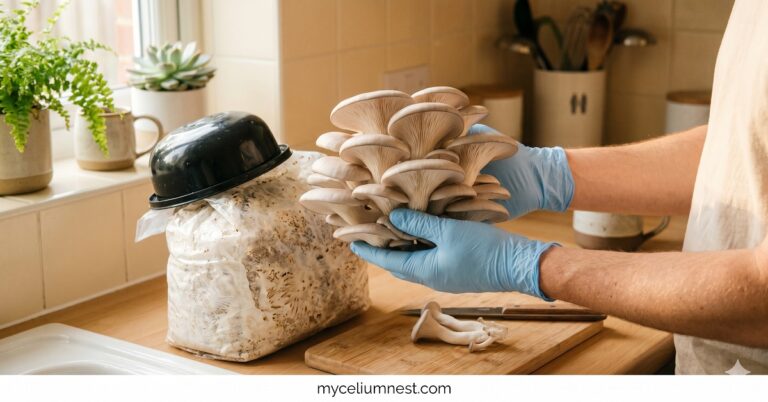
Is it safe to eat mushrooms from a block that had contamination on one side?
No. Even if the mushrooms appear to have grown on the “clean” side of a contaminated block, the substrate throughout the block has been exposed to contamination byproducts and potentially mycotoxins. Trichoderma produces compounds that are not destroyed by cooking. Aspergillus produces aflatoxins. The safe position is: if the block was contaminated, do not eat any mushrooms from it regardless of where they fruited from. This is not worth the health risk.
What contamination rate is normal for home growers?
For beginners working without a flow hood: 20–40% contamination on the first few batches is common and expected. As technique improves: 10–20% is achievable without a flow hood using a still air box. With a proper laminar flow hood and optimised technique: experienced growers achieve 2–5% contamination rates. Commercial operations target below 1%. If your rate is above 40% after 3–4 batches with the same technique, something systematic is wrong — most likely the spawn source or inoculation environment.
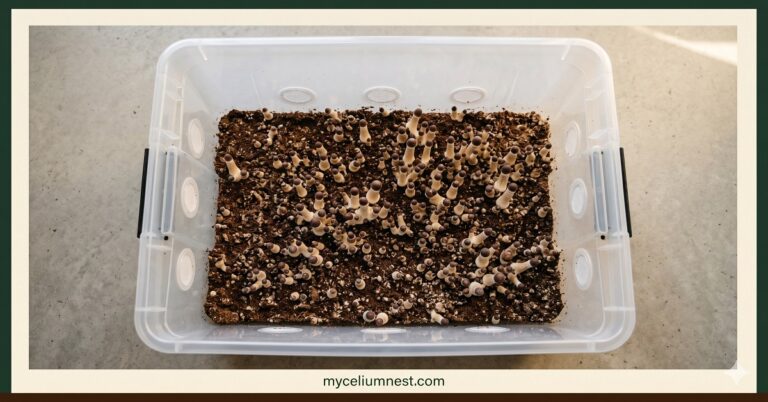
One Last Chance: The Outdoor Burial Method
Before composting a contaminated or exhausted block, there is one technique worth attempting — particularly if you have a garden, yard, or outdoor growing space. The outdoor burial method leverages the fact that oyster mushroom mycelium is extraordinarily competitive in cool, moist outdoor conditions where laboratory-style contamination organisms (Trichoderma, Bacillus) are less dominant.
Indoors, contaminating organisms have every advantage: sterile substrate, controlled temperature, and no competing soil microbiome. Outdoors, the environment is reversed. Native soil bacteria and fungi compete against Trichoderma. Cooler temperatures slow competing moulds. Earthworm and soil insect activity creates air pockets and moisture channels that benefit mycelium. In many cases, the oyster mushroom mycelium — which is one of the most competitive and aggressive decomposers in nature — recovers and produces a surprise flush directly from the buried block.
Who This Works Best For
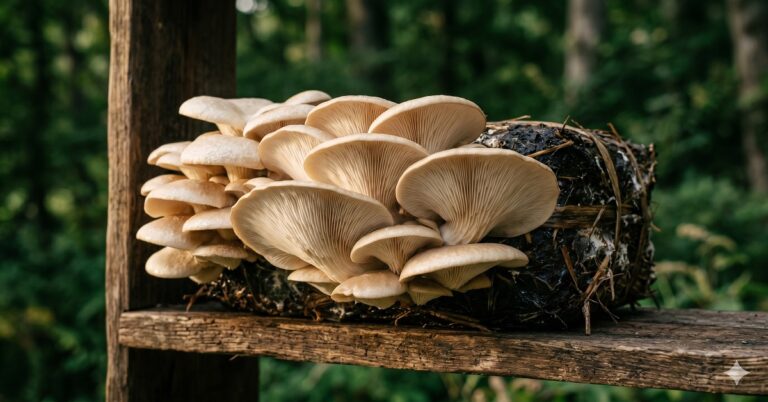
- Oyster mushrooms (all species): The most reliable candidates — especially pearl and blue oyster, which are naturally adapted to cool outdoor conditions
- Lightly contaminated blocks: Blocks where contamination is superficial (on the surface) rather than throughout the entire substrate mass
- Exhausted blocks after 3+ flushes: Even non-contaminated exhausted blocks buried outdoors occasionally produce surprise flushes from residual mycelium
- Warm/temperate climates: Best results in spring and autumn when outdoor temperatures are 10–20°C
The Burial Process
- Choose your site. A shaded location under trees, beside a garden border, or in a raised bed is ideal. Partial shade (2–4 hours of direct sun maximum) and consistent moisture (near a lawn sprinkler zone or naturally moist ground) are the key factors. Avoid full sun — the block will desiccate faster than the mycelium can recover.
- Open or break apart the block. Remove the plastic bag entirely. If the block is very large, break it into 3–4 pieces — more surface area exposure helps the mycelium contact soil organisms and moisture.
- Bury shallowly — not deeply. Dig a 5–10cm (2–4 inch) depression. Place the block material into it and cover lightly with a thin layer of loose soil, wood chip mulch, or straw. The block should be barely covered — not buried deeply. You want soil contact while still allowing airflow and some surface exposure.
- Water well at installation and regularly thereafter. Keep the burial site consistently moist — particularly during the first 4 weeks. If you’re in a dry period, water the site 2–3 times per week.
- Wait and check weekly. Outdoor flushes typically appear 3–8 weeks after burial in appropriate conditions, often after significant rainfall following a dry period.
Realistic Expectations
Disclosure: This article contains Amazon affiliate links. We earn a small commission at no extra cost to you. See our full disclosure.