How to Build a Fruiting Chamber: Shotgun FC + Martha Tent Guide
A fruiting chamber is the controlled environment in which colonised mushroom substrate produces fruit bodies. While it’s technically possible to fruit mushrooms by misting a bag on an open shelf, a proper fruiting chamber maintains the humidity, fresh air exchange (FAE), and temperature stability that dramatically improves yield consistency, reduces contamination risk, and makes the whole process considerably less labour-intensive. Follows as we guide you on how to build a fruiting chamber.
This guide covers the two most widely used fruiting chamber designs for home growers: the Shotgun Fruiting Chamber (SGFC) — a simple, cheap, highly effective $15 DIY build — and the Martha Tent — a scalable setup for growers managing multiple blocks simultaneously.
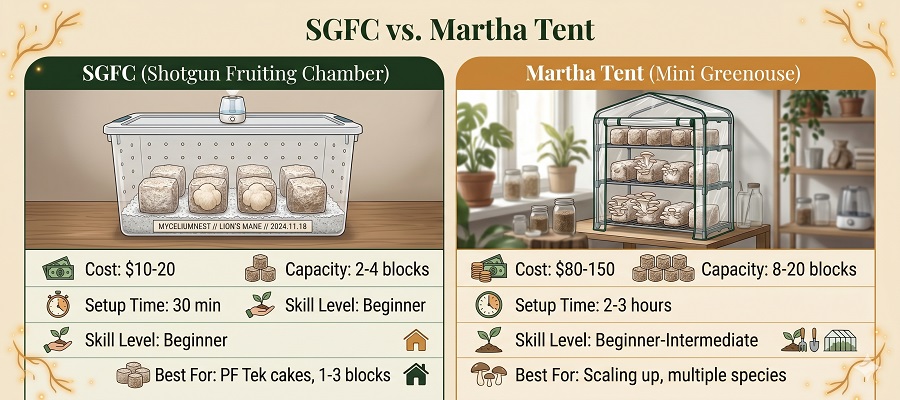
Which Fruiting Chamber Is Right for You?
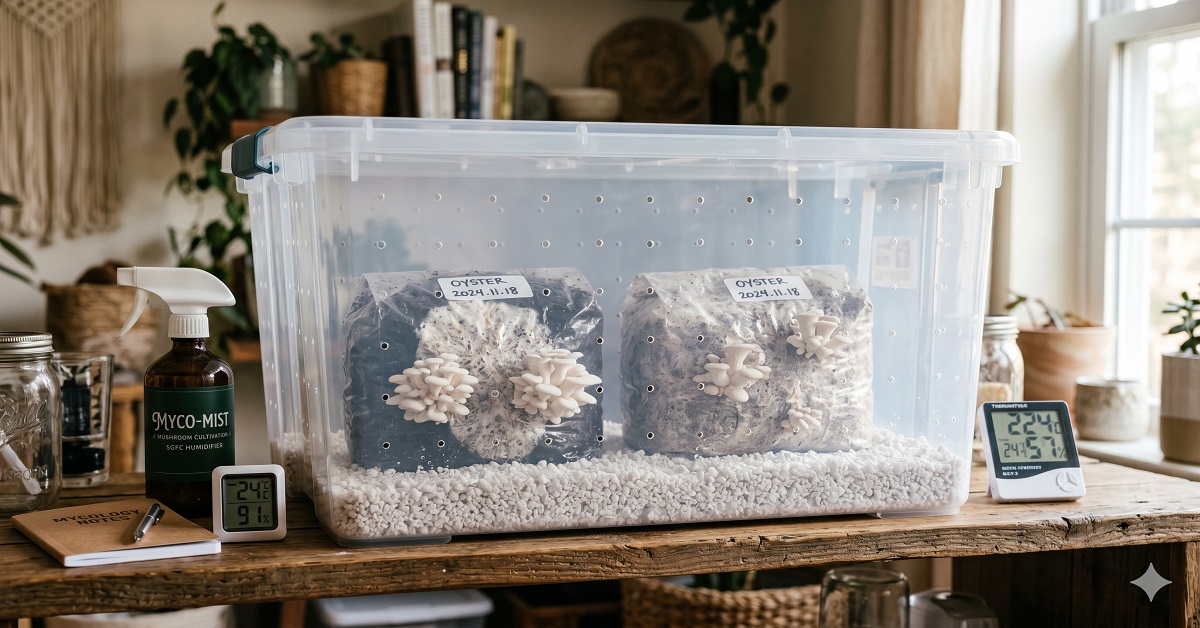
The Shotgun Fruiting Chamber (SGFC)
The Shotgun Fruiting Chamber is the most popular beginner fruiting chamber design in home mycology — used by hundreds of thousands of growers worldwide. The name comes from the shotgun-like pattern of holes drilled across all sides and the lid of the container.
Materials for the SGFC
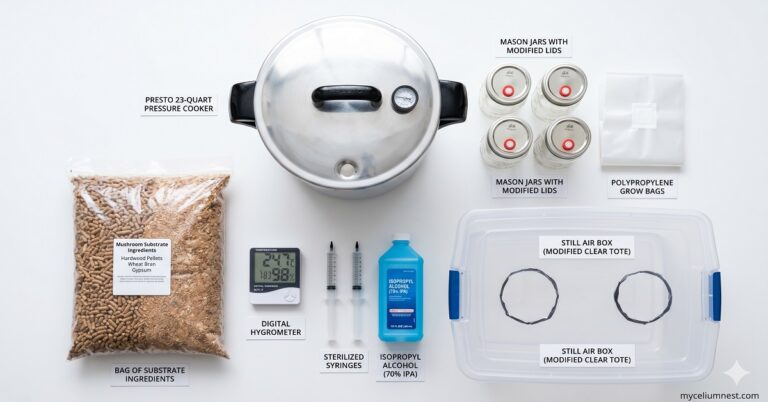
- 66-quart clear plastic storage tub with lid — Sterilite or Rubbermaid, clear preferred so you can see inside
- Perlite — 4–5 litres (horticultural grade; available at any garden centre or on Amazon)
- Power drill with ¼ inch (6mm) drill bit
- Spray bottle for misting
- Digital hygrometer/thermometer
Step-by-Step SGFC Build
- Mark hole locations. On all four sides of the tub AND the lid, mark holes in a grid pattern approximately every 2 inches (5cm). You’ll drill roughly 50–80 holes total. More holes = better FAE = healthier fruits.
- Drill the holes. Use a ¼ inch (6mm) drill bit. Work slowly to avoid cracking the plastic — press firmly and let the drill do the work. Sand any rough edges with fine sandpaper.
- Prepare the perlite. Rinse your perlite in a colander under running water until the water runs clear (removes dust). Spread on a towel and allow to drain but not fully dry — slightly damp perlite maintains humidity better than dry.
- Add perlite to the base. Pour 2–3 inches (5–7cm) of damp perlite into the base of the tub. This acts as the humidity reservoir — as you mist the perlite, it slowly releases moisture into the chamber air.
- Add a raised platform. Place your blocks or cakes on a small rack, inverted container lid, or several jar lids to elevate them above the perlite layer. Direct contact with wet perlite can cause bacterial issues on the base of the block.
- Set up your hygrometer. Place your digital hygrometer/thermometer inside the chamber where you can read it without opening the lid.
Using the SGFC
Mist the inside walls of the chamber (not directly onto the mushrooms or cakes) 2–4 times daily. The target is 85–95% relative humidity. Fan the chamber 3–4 times daily by opening the lid and waving it gently back and forth for 10–15 seconds — this flushes out CO₂ and replenishes oxygen, which is critical for healthy fruit body development.
The Martha Tent Setup
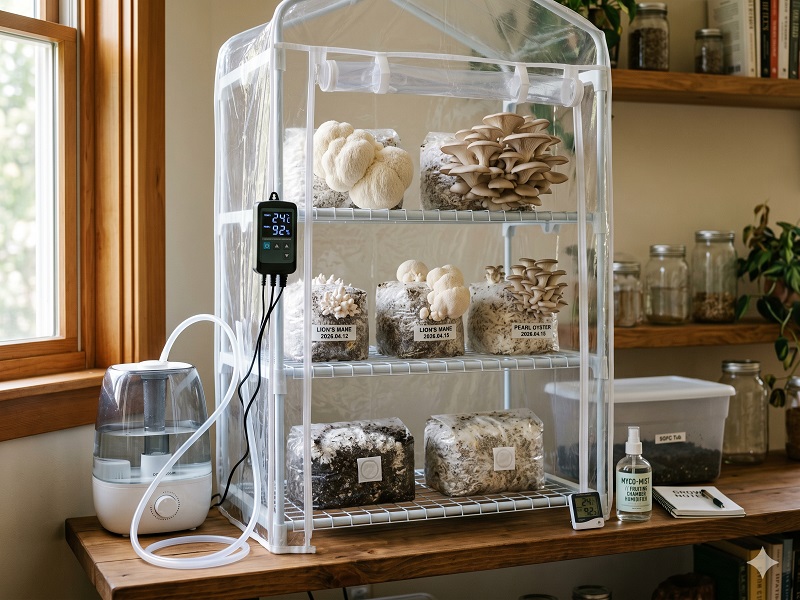
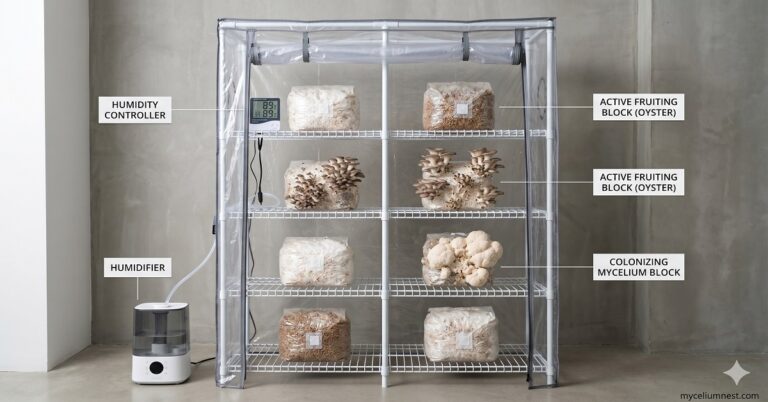
The Martha Tent is named after the wire-shelf greenhouse tents originally sold for seed starting, manufactured by companies including Gardman and Outsunny. These clear PVC-covered metal shelving tents create an enclosed growing environment that’s far more easily automated than the SGFC.
Materials for the Martha Tent
- 4-tier wire shelf greenhouse tent — approximately 27″W × 18″D × 63″H
- Ultrasonic humidifier — 4–6 litre capacity, cool mist
- Inkbird IHC-200 humidity controller — plug-in automation for the humidifier
- Small clip fan (4–6 inch) — for air circulation inside the tent
- Digital timer (for the fan — set to run 30 seconds every 4 hours initially)
- Flexible tubing or duct to connect humidifier to tent interior
Martha Tent Configuration
- Assemble the tent and zip closed. Most tents have a Velcro or zippered front panel — this is your access point.
- Position the humidifier outside the tent with the mist tube running through a small hole or gap into the tent interior. Point the mist output toward the center of the tent at a medium shelf height.
- Connect the Inkbird controller. Plug the humidifier into the Inkbird outlet; set the target humidity to 88–92% and the hysteresis (tolerance) to ±3%. The Inkbird will automatically run the humidifier whenever RH drops below your target.
- Install the small fan inside the tent, on a timer, set to run 30 seconds every 2–4 hours. This provides fresh air exchange without continuously drying out the fruiting bodies. Angle the fan to circulate air throughout the tent without blowing directly onto any block.
- Place blocks on the wire shelves. Ensure blocks on lower shelves don’t block humidified air from reaching upper shelves.
For a full comparison of humidifier options and features, see our dedicated best humidifier for mushroom growing guide. And for the full Martha Tent setup process with exact equipment links, read our Martha Tent growing guide.
The Micro-Fruiting Chamber — For Small Spaces & Apartment Growers
Not everyone has room for a 4-tier greenhouse tent. If you’re growing in a studio apartment, a small bedroom, or a shared living space, the Martha Tent can be impractical — too large, too conspicuous, and requiring a dedicated outlet and floor space. The Micro-Fruiting Chamber solves all of these problems in a footprint smaller than a shoebox.
What Is a Micro-Fruiting Chamber?
A Micro-FC uses the same principle as the full Shotgun Fruiting Chamber but scaled down to a 20-quart (or smaller) clear storage tub — small enough to sit on a windowsill, a bathroom counter, or a desk shelf. It’s ideal for:
- Apartment growers with limited space
- Growing a single block or 2–3 BRF cakes from a PF Tek run
- Testing a new species before committing to a larger setup
- Growers who want a discreet, low-profile growing setup
Micro-FC Materials List
- 20-quart clear storage tub (Sterilite or similar)
- ¼ inch (6mm) drill bit + power drill
- 1 litre of horticultural perlite
- Small spray bottle (100–250ml)
- Mini digital hygrometer (clip-type)
- Optional: small USB mini-humidifier for automated misting
Micro-FC Build Steps
- Drill the holes — same as the SGFC: ¼ inch holes every 2 inches across all four sides and the lid. For a 20-quart tub, you’ll drill approximately 25–35 holes total.
- Add 1–2 inches of damp perlite to the base. This smaller volume still provides meaningful humidity buffering for a single block or a pair of BRF cakes.
- Place your block or cakes on a small elevated platform — jar lids or a small piece of wire mesh work perfectly.
- Mist walls 3–4 times daily — the smaller volume means humidity drops faster than in a large SGFC. Twice daily misting is the minimum; 3–4 times is better for species like lion’s mane.
- Fan twice daily — open the lid and wave gently for 10–15 seconds. In a small space, CO₂ builds faster; be diligent about fresh air exchange.
Micro-FC Performance vs. Full SGFC
The bottom line: A Micro-FC produces mushrooms of identical quality to a full SGFC. The only trade-offs are smaller capacity and more frequent manual misting. For a single block on a kitchen counter, it’s the perfect solution — and at under $15, there’s no reason not to have one ready before your first colonised block is ready to fruit.
Environmental Parameters by Species
Frequently Asked Questions
How many times a day should I mist my fruiting chamber?
For an SGFC, mist the interior walls (never directly onto mushrooms or cakes) 2–4 times daily depending on your ambient humidity. The goal is to maintain 85–95% RH as measured by your hygrometer. In very dry climates or during winter heating season, you may need to mist every 4–6 hours. A humidity controller eliminates this guesswork entirely — highly recommended for serious growers.
My mushrooms are developing long stems and tiny caps — what’s wrong?
This is the classic sign of insufficient fresh air exchange — too much CO₂ building up in the chamber. Fan the chamber more frequently (or for longer durations if using a Martha Tent), enlarge any ventilation holes, or add a fan on a more frequent timer cycle. The mushrooms will self-correct within 12–24 hours of improved FAE.
Can I use the same fruiting chamber for multiple mushroom species?
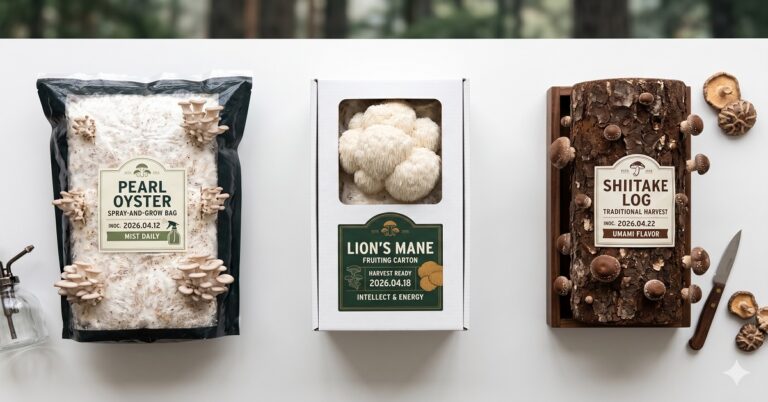
Yes, but only if their fruiting parameters are compatible. Pearl oyster, pink oyster, and lion’s mane all fruit well in 85–95% humidity — they can share a chamber. However, mixing species with very different temperature requirements (e.g., pink oyster at 30°C and blue oyster at 15°C) in the same chamber will compromise one or both. When in doubt, check the fruiting parameters table above and our full fruiting conditions guide.
Do I need grow lights for my fruiting chamber?
Mushrooms do not photosynthesize and do not require grow lights as plants do. They use light primarily as a directional cue — orienting their growth toward light sources. 12 hours of indirect natural daylight or ambient room lighting is sufficient. If you’re growing in a completely dark room, a small LED strip on a 12-hour timer provides adequate orientation cues. High-intensity grow lights are unnecessary and can dry out your fruiting space if they generate heat.
Disclosure: This article contains Amazon affiliate links. See our full disclosure.