PF Tek Method: The Definitive Beginner’s Guide to Mushroom Cultivation
The PF Tek method is the most widely used mushroom cultivation technique among hobby growers worldwide — and for good reason. Developed by Robert McPherson (known online as Psilocybe Fanaticus, hence “PF”) in the 1990s, the technique uses small mason jars filled with a brown rice flour (BRF) and vermiculite substrate that can be sterilised in a home pressure cooker, inoculated with a syringe, and fruited with minimal equipment.
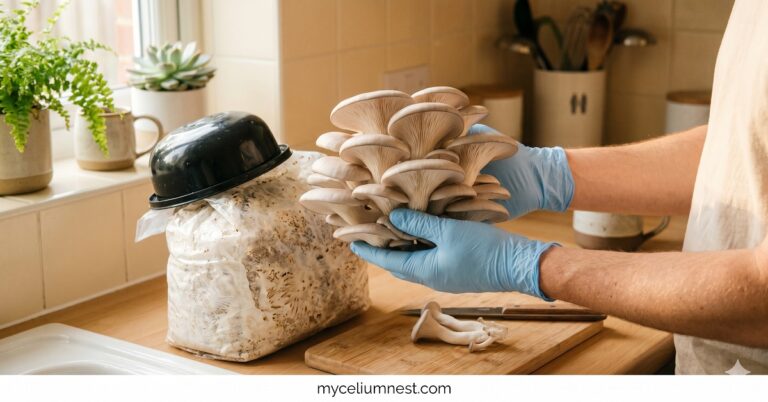
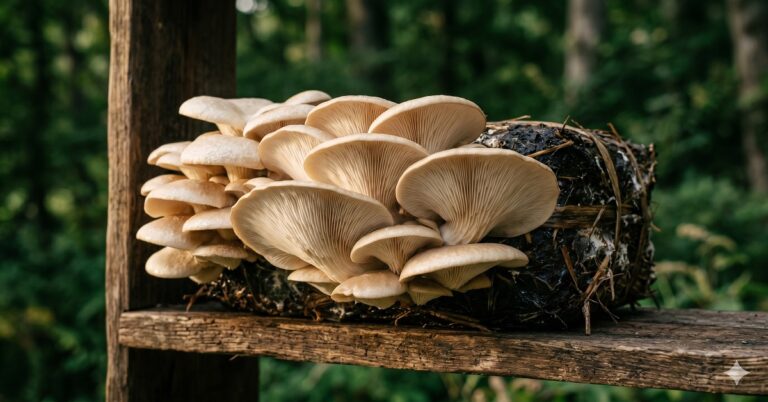
While PF Tek was originally popularised for Psilocybe species cultivation — a topic outside the scope of this site — the technique works equally well for cultivating legal culinary and functional mushrooms. Pearl oyster mushrooms, lion’s mane, shiitake, and reishi can all be grown using PF Tek jars as spawn that then inoculates a larger bulk substrate.
What Is PF Tek and How Does It Work?
PF Tek uses brown rice flour (BRF) mixed with vermiculite as a substrate, packed into half-pint wide-mouth mason jars and sterilised in a pressure cooker. After sterilisation and cooling, the jars are inoculated through the lid with a spore syringe or liquid culture syringe. The mycelium then colonises the substrate over 2–4 weeks, after which the “cake” (the fully colonised substrate mass) is removed from the jar and fruited.
Why PF Tek Became the Standard Beginner Technique
- Small batch size. Half-pint jars hold 240ml — small enough to sterilise effectively in any home pressure cooker, and small enough that a contaminated jar doesn’t represent a significant loss
- Forgiving substrate. The BRF + vermiculite formula is nutritious enough for good mycelial growth but not so rich that contamination is inevitable (unlike fully supplemented hardwood blocks)
- Visible progress. Clear mason jars let you watch colonisation happen in real time — this is genuinely one of the most satisfying aspects of PF Tek for beginners
- Minimal equipment. Beyond the jars and a pressure cooker, you need almost nothing else for the cultivation stage
Complete Materials List
- Brown rice flour (BRF) — food grade
- Horticultural vermiculite (medium grade)
- Water (filtered or tap, at room temperature)
- Wide-mouth half-pint mason jars (Ball or Kerr)
- Polyfill (polyester stuffing) for lid modification
- Hammer and large nail (to create inoculation ports)
- Micropore tape or Tyvek squares
- Pressure cooker (15 PSI, 23+ quart recommended)
- Canning rack or jar rings to elevate jars from base
- Aluminium foil (to cover lids in pressure cooker)
- Spore syringe or liquid culture syringe
- 70% isopropyl alcohol (spray bottle)
- Nitrile gloves (several pairs)
- Lighter or alcohol lamp (for needle sterilisation)
- Still air box or flow hood (ideal but not mandatory)
The Ball Wide-Mouth Half-Pint Mason Jars are the standard choice — widely available and perfectly sized. For the pressure cooker, the Presto 23-Quart Pressure Canner comfortably fits 10–12 half-pint jars per run. See our full pressure cooker comparison guide for all options.
The BRF Substrate Recipe
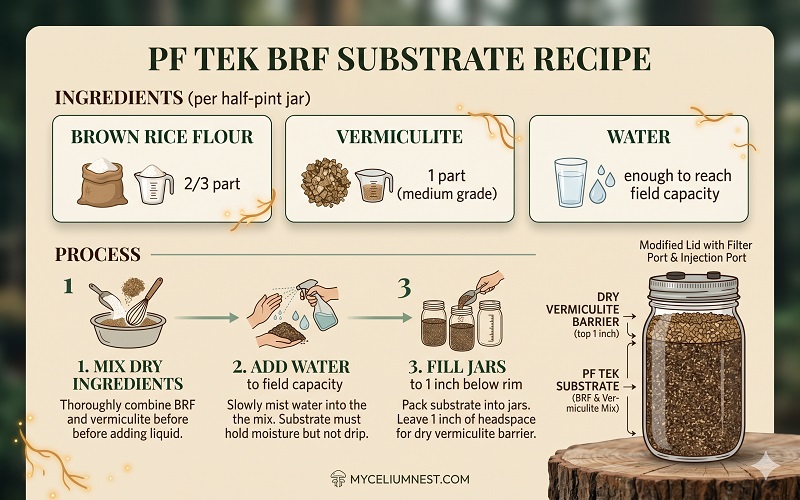
Standard PF Tek Ratio (Per Half-Pint Jar)
- Brown rice flour (BRF): 2/3 part (approximately 80ml per half-pint jar)
- Vermiculite: 1 part (approximately 120ml per half-pint jar)
- Water: to field capacity — typically 2/3 part (approximately 80ml, or until the mixture clumps but doesn’t drip when squeezed)
Preparation Steps
- Combine BRF and vermiculite in a bowl and mix dry
- Add water incrementally, mixing as you go, until the mixture reaches field capacity: a handful should clump together and feel uniformly moist, but squeeze out only 1–2 drops of water maximum
- Fill each jar to approximately 1 inch (2.5cm) below the rim — this space is critical and creates a dry vermiculite casing layer that protects against airborne contaminants
- Pack the substrate gently — firm but not compressed
- Fill the remaining 1-inch headspace with dry vermiculite. This top layer is your contamination barrier
Preparing and Sterilising Your Jars
Lid Modification: Creating Inoculation Ports
Before sterilising, you need to create a way to inject your syringe through the lid without contamination. There are two methods:
- The Polyfill Method (Recommended): Use a hammer and nail to punch 4 small holes through the metal lid. Fill each hole with a small plug of polyfill (polyester fiberfill). The polyfill allows gas exchange during incubation while filtering airborne contaminants. Cover the entire lid top with a square of aluminium foil before pressure cooking to protect the polyfill.
- Self-Healing Injection Port (Advanced): Use a hot glue gun to inject a small amount of high-temp silicone into a single hole. When cooled and cured, the silicone allows syringe needles to penetrate and then self-seals. This is cleaner but requires more setup time.
The Sterilisation Process
- Place a canning rack or folded towel in the bottom of your pressure cooker — jars should never rest directly on the metal base (they can crack from uneven heat)
- Add 2–3 inches of water to the cooker
- Load jars — they can touch each other but shouldn’t be tightly packed
- Cover each jar lid with a square of foil (shiny side down) to keep moisture out of the polyfill
- Lock the lid and heat on high until the weight begins to rock/steam; reduce heat to maintain a slow, steady steam
- Sterilise at 15 PSI for 60–90 minutes (half-pint jars)
- Turn off heat and allow to cool completely to room temperature — never open the cooker while pressurised. Allow 8–12 hours of cooling before inoculating
Inoculation — The Most Critical Step
Inoculation is where most beginner contamination occurs. Speed, cleanliness, and confidence are your three tools. The entire inoculation process for a batch of 10 jars should take under 5 minutes once you’re set up.
Setting Up Your Inoculation Space
Ideally, use a still air box (SAB) — a large clear plastic tub you work inside with your arms through holes cut in the side, which creates a protected air space with minimal airflow. If you don’t have one, choose the stillest room in your home (bathroom with shower running to settle dust works surprisingly well), wipe all surfaces with IPA, and move as slowly and deliberately as possible — human movement creates far more airborne contamination than still air.
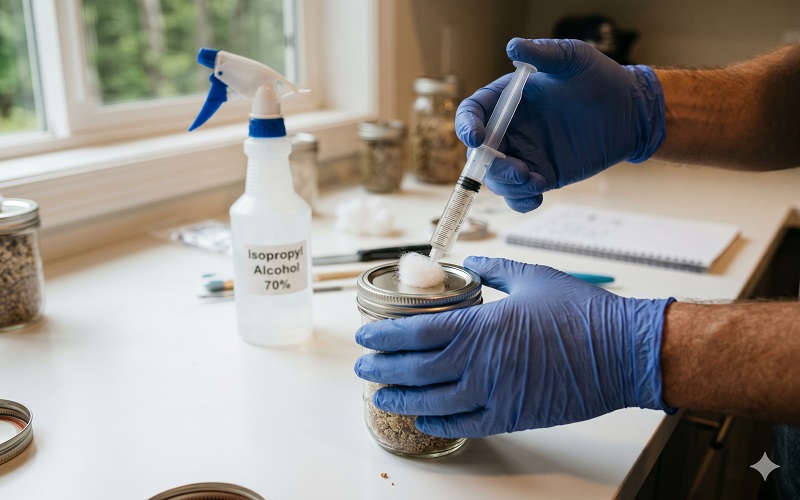
The Inoculation Procedure
- Spray hands and gloves thoroughly with 70% isopropyl alcohol
- Flame sterilise the syringe needle until glowing red-hot. Allow to cool for 3–5 seconds. Do not blow on the needle to cool it — your breath contains bacteria
- Wipe the needle with an IPA-saturated cotton ball or paper towel
- Inject 1–2ml of spore or liquid culture solution into each jar through one of the polyfill ports or your injection port. Angle the needle so the liquid runs down the inside edge of the glass — not straight into the center of the substrate
- Re-flame the needle between every 2–3 jars
- Once inoculated, replace the foil covering each lid. Do not disturb for at least 48 hours
One Syringe for How Many Jars?
A standard 10ml spore or liquid culture syringe can inoculate 10–20 half-pint jars at 0.5–1ml per jar. Liquid culture colonises faster and more reliably than spore solution — if you have access to both, liquid culture is the better choice for beginner success rates.
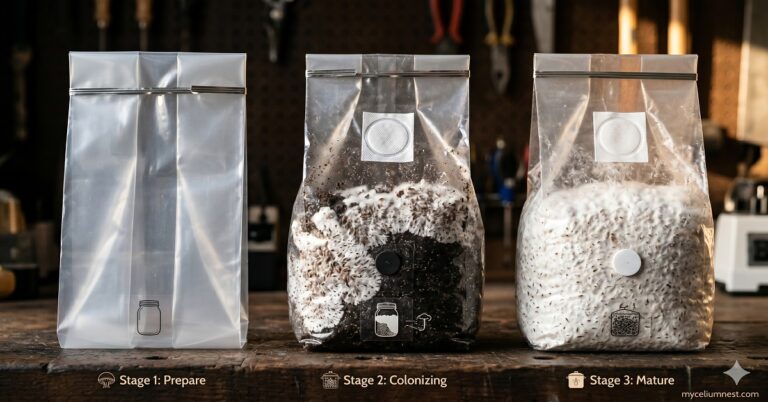
Incubation
Place your inoculated jars in a warm, dark location. Check daily for signs of colonisation and contamination.
What Healthy Mycelium Colonisation Looks Like
- White or off-white mycelium spreading from the inoculation points outward in radiating strands
- A fresh, mushroomy or slightly earthy smell when you smell near (but don’t open) the lid
- Some metabolic heat — the jars may feel slightly warmer than room temperature (this is normal and healthy)
- Complete colonisation in 2–4 weeks depending on species, temperature, and spawn quality
Any green, black, pink, or orange colouration = contamination. Isolate the jar immediately in a sealed plastic bag and dispose of it outdoors. See our mushroom contamination guide for full identification and prevention guidance.
Fruiting Your BRF Cakes
Once a jar is 100% colonised with no visible substrate colour showing through, it’s ready for fruiting. The colonised BRF mass that comes out of the jar is called a “cake.”
Birthing the Cakes
- Spray your work surface and gloves with IPA
- Open the jar and tip the cake out into a clean bowl — it should slide out cleanly as one solid mass
- Optionally, roll the cake gently in dry vermiculite — this creates a protective outer layer that holds moisture during fruiting and reduces direct contamination exposure
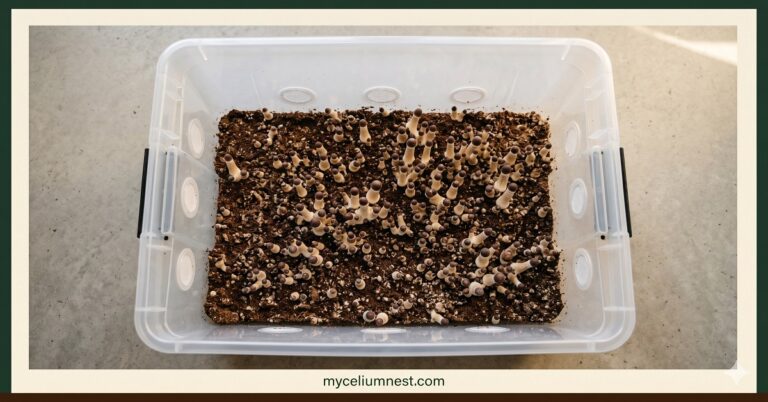
- Place the cake in a fruiting chamber
Dunk and Roll Method (For Additional Flushes)
Before placing cakes in the fruiting chamber, or between flushes, “dunking” rehydrates the substrate: submerge the cake in cold water for 12–24 hours in a sealed bag or container. This dramatically improves yield consistency across multiple flushes. After dunking, roll in dry vermiculite and return to fruiting conditions.
For building a proper fruiting environment for your cakes — from a simple Shotgun Fruiting Chamber to a full Martha Tent — read our step-by-step fruiting chamber guide. For the best fruiting conditions for specific species, see our fruiting conditions guide.
Moving Beyond PF Tek: Bulk Substrates
PF Tek cakes are excellent for learning the fundamentals, but their yield per unit of effort is lower than bulk substrate grows. Once you’ve successfully grown from 2–3 batches of BRF cakes, the natural next step is using your PF Tek jars as spawn to inoculate a larger bulk substrate block.
Break up a fully colonised BRF cake and mix it through a larger volume of bulk substrate (pasteurised straw, hardwood pellets, or coco coir). The broken cake acts as spawn — the mycelium aggressively colonises the bulk substrate and produces dramatically larger harvests than the original cake alone. This transition is covered in detail in our grain spawn guide.
Frequently Asked Questions
Can I use PF Tek without a pressure cooker?
Technically yes — you can use a double-boiling method (jars in a pot of water, steam-sterilised) for 90 minutes, which reaches approximately 100°C. This is insufficient for true sterilisation (which requires 121°C / 15 PSI) but may work for species with very aggressive mycelium, like some oyster varieties. However, contamination rates will be significantly higher. For reliable results, a pressure cooker is strongly recommended. The Presto 23-quart is the most popular choice under $90.
Why is the top layer of my BRF cake turning green right away?
Green is Trichoderma mould — the most common contaminant in mushroom cultivation. If it appears in the first 48–72 hours, contamination almost certainly entered during inoculation (either from the syringe, the needle, your hands, or the air). If it appears after the first week, it likely entered through the polyfill ports or from a crack in the jar. Review your inoculation hygiene protocol rigorously — IPA on all surfaces, flamed needle, still air box or minimal air movement. See our contamination guide for a full diagnosis.
Is PF Tek legal?
Growing culinary and functional mushroom species — oyster, lion’s mane, shiitake, reishi, and all other edible varieties covered on this site — using PF Tek or any other cultivation method is completely legal in all US states, Canada, UK, Europe, and Australia. There are no legal restrictions on cultivating edible species. MyceliumNest covers only legal edible and functional mushroom species.
How many flushes will I get from PF Tek cakes?
Typically 3–5 flushes from a single cake, with yields decreasing with each flush as nutrients are depleted. Using the dunk-and-roll method between flushes significantly extends productivity. After 3–4 flushes, the substrate becomes exhausted and contamination risk increases sharply — this is the time to compost the spent cakes and start fresh.
What’s the difference between PF Tek and grain spawn?
PF Tek uses BRF (brown rice flour) + vermiculite as the substrate itself — you fruit directly from the colonised cake. Grain spawn uses rye, wheat berries, or popcorn as a spawn medium that is then used to inoculate a larger bulk substrate for much higher yields. PF Tek is simpler and more beginner-accessible; grain spawn requires more equipment and technique but delivers significantly higher yields per unit of effort. Most growers start with PF Tek, then transition to grain spawn once comfortable with sterilisation and inoculation technique.
Disclosure: This article contains Amazon affiliate links. We earn a small commission at no extra cost to you. See our full disclosure.