Liquid Culture for Mushroom Growing: The Complete Guide
A spore syringe contains dormant spores that must germinate before colonisation begins — adding 5–10 days to every grain jar. A liquid culture (LC) syringe contains active, already-growing mycelium that begins colonising grain immediately. The result: grain jars colonise in 7–12 days with LC vs. 14–21 days with spores, at 2–3× lower contamination rate because the head start outcompetes contaminants. LC is the upgrade that costs almost nothing and pays compound interest on every batch you run.
What Liquid Culture Is — and What It Isn’t
Liquid culture is a nutritive liquid medium (usually a simple sugar solution) in which mushroom mycelium is actively growing — suspended as microscopic threads throughout the liquid. When you draw LC into a syringe and inject it into a sterilised grain jar or substrate bag, you’re delivering already-active mycelium that immediately begins colonising from multiple points throughout the substrate.
Liquid culture is not:
- A spore syringe (spore syringes contain dormant spores, not active mycelium)
- Agar (agar is a solid medium; LC is a liquid medium)
- A guarantee of genetic uniformity — LC made from multi-spore germination contains multiple genetic variants; LC cloned from selected tissue is genetically consistent
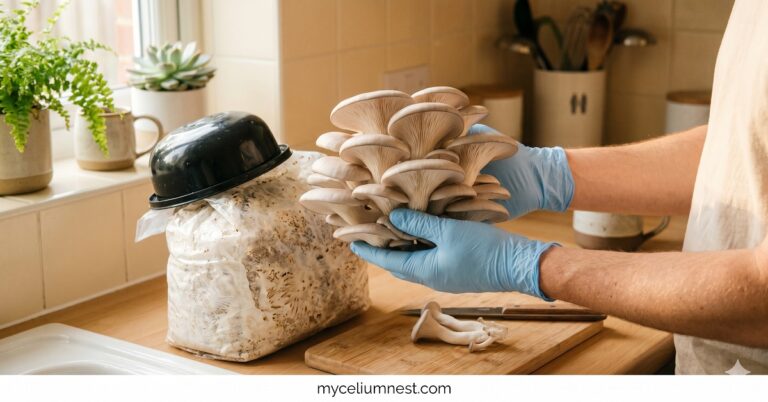
This guide focuses on making LC from existing mycelium (grain-to-grain or agar transfer), which is the most reliable and genetically consistent method for home cultivators who already have grain spawn from our grain spawn guide.
Liquid Culture Recipe: The Formulations That Work
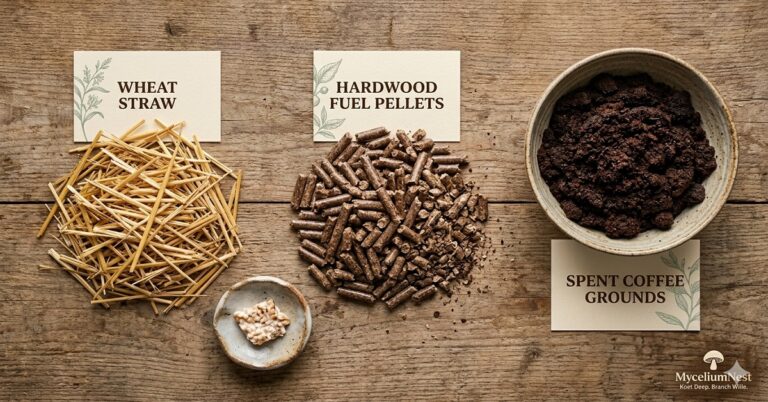
LC medium needs to provide a carbon energy source for mycelial growth, sterile water as the carrier, and nothing else. The formulas below have been tested across multiple species:
Simple, effective, and uses ingredients available in every kitchen. Light honey (clover, acacia) preferred — dark honey can inhibit some species. Our default formula for all species.
Highly refined, low-contamination risk. Industry standard among advanced growers. Produces very clean, fast-spreading LC. Available at grocery stores.
Contains additional nitrogen and amino acids that support faster mycelial density. Slightly higher contamination risk than honey or corn syrup. Best for aggressive species like oyster.
Making Liquid Culture: Step-by-Step
Equipment
- 250ml or 500ml mason jar with modified lid (self-healing injection port + polyfill vent hole)
- Pressure cooker at 15 PSI
- Still air box or flow hood for inoculation
- 10ml or 20ml syringe + 18-gauge needle for drawing LC
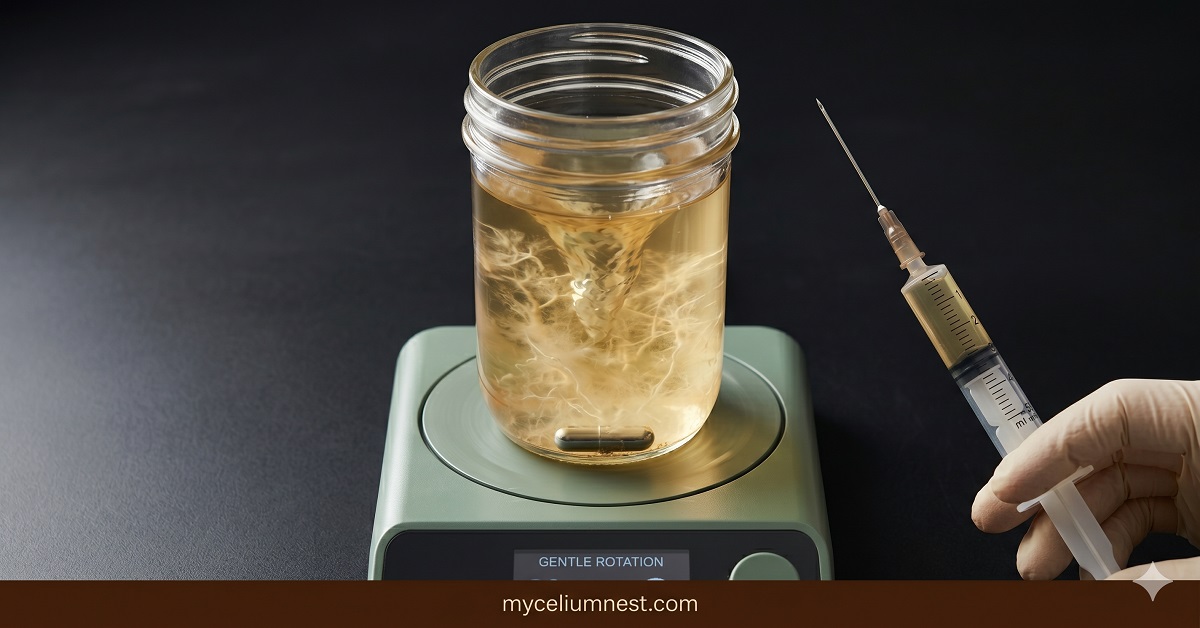
- Optional: magnetic stir plate and stir bar — dramatically improves LC quality
Process
- Prepare the medium. Dissolve your chosen sugar source in distilled or filtered water at room temperature. Stir until fully dissolved. Pour 200ml into a 250ml mason jar (never fill more than 80% to prevent boilover during sterilisation).
- Prepare the jar lid. Drill one hole for a self-healing injection port and one small vent hole plugged with polyfill. The injection port allows drawing LC with a syringe without opening the jar. The vent allows gas exchange during mycelial growth.
- Sterilise at 15 PSI for 20–30 minutes. LC medium requires significantly less sterilisation time than grain — 20–30 minutes at 15 PSI is sufficient for 200ml. Allow to cool completely (12+ hours) before inoculating.
- Inoculate in a still air box or flow hood. Using a sterilised needle, transfer a small amount of colonised grain (2–3 kernels, broken up) or a small piece of colonised agar directly into the LC jar through the injection port. Work quickly.
- Agitate daily. Once inoculated, agitate the jar by swirling for 30 seconds each day to break up mycelial clumps and oxygenate the medium. A magnetic stir plate set to low speed does this continuously and produces dramatically faster, more uniform LC density.
- Ready to use in 5–10 days when the liquid shows visible white mycelial threads throughout and agitation creates a uniform white cloud.
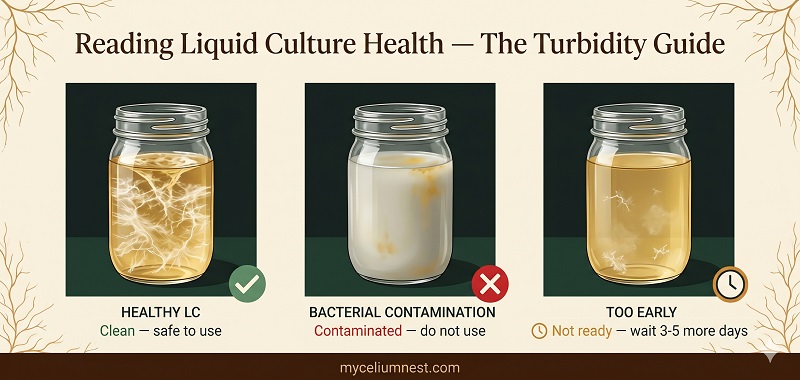
The Turbidity Test: How to Read Your LC’s Health
This is the diagnostic skill that saves batches. LC contamination and healthy LC can look similar at first glance — both produce cloudy liquid. The difference is in the type of turbidity, and recognising it visually prevents inoculating an entire grain batch with contaminated LC.
Using Liquid Culture to Inoculate Grain
Draw 2–3ml of LC into a sterile 10ml syringe using a new 18-gauge needle. Agitate the LC jar just before drawing to distribute mycelial threads evenly throughout the liquid.
For each quart jar of grain spawn: inject 1–2ml of LC through the polyfill filter. The needle passes through polyfill cleanly and the polyfill reseals around the puncture. Work in a still air box or flow hood — see our comparison guide.
After injection, shake the jar thoroughly to distribute the LC throughout the grain. Expect visible colonisation within 3–5 days (vs. 7–10 days with spores) and full colonisation within 7–14 days at 22–24°C.
Syringe Hygiene: How to Reuse Syringes Safely Across Multiple LC Draws
A quality 10ml or 20ml syringe is reusable across many LC draws and inoculation sessions — reducing cost significantly and eliminating the waste of treating syringes as disposable. However, multi-use only works if specific hygiene protocols are followed precisely between each use. Here is the exact protocol we use:
Equipment: The Luer Lock Cap
A Luer Lock cap is a small threaded cap that screws onto the needle hub of a Luer Lock syringe, creating an airtight seal when the needle is removed. This is the piece of equipment that makes syringe reuse practical — without it, the syringe barrel is exposed to ambient air between uses, risking contamination of your remaining LC.
Luer Lock syringes and matching caps are available together: search for Luer Lock syringes with caps on Amazon. Ensure your needle and cap are both Luer Lock (threaded) not Luer slip (friction-fit) — Luer slip caps are not reliably airtight.
Storage: How Long LC Stays Viable
Frequently Asked Questions
Can I make LC from a store-bought mushroom?
Yes — tissue culture from a store-bought mushroom is one of the most accessible ways to start LC without purchasing spores. Select a fresh, young mushroom (older specimens have reduced viability). Wipe the outside with 70% isopropyl alcohol. In a still air box, tear the stem base with two sterile needles to expose the inner tissue without exposing it to the air. Transfer a small amount of this interior tissue directly into your prepared LC jar. Viability rate from store-bought tissue is 50–70% — lower than from colonised grain or agar, but viable enough to be worth attempting.
My LC has been sitting for 3 weeks and is barely growing — is it dead?
Not necessarily. Slow LC development is most commonly caused by insufficient agitation (mycelium clumps rather than spreading), temperature too low (below 18°C significantly slows LC growth), or contaminated/dead inoculation source. Test: agitate vigorously for 60 seconds, place in a consistently warm location (22°C), and check for thread development at 48 and 96 hours. If no growth after 5 days of this treatment, the LC is not viable — start a new jar with fresh inoculation from a known-good source.
Do I need a magnetic stir plate for liquid culture?
No — manual daily agitation produces perfectly functional LC. However, a magnetic stir plate running at low speed (50–100 RPM) produces LC that is 2–3× denser in the same time period, because continuous agitation keeps mycelial fragments separated and maximises oxygen contact at all times. If you’re making multiple LC jars regularly, a stir plate (available for $30–60) becomes one of the highest-ROI equipment additions in y
Disclosure: This article contains Amazon affiliate links. See our full disclosure.